How to restore a
website
from the Web Archive
This tutorial explains how you can recover a website from the Waybackmachine.
Download your files
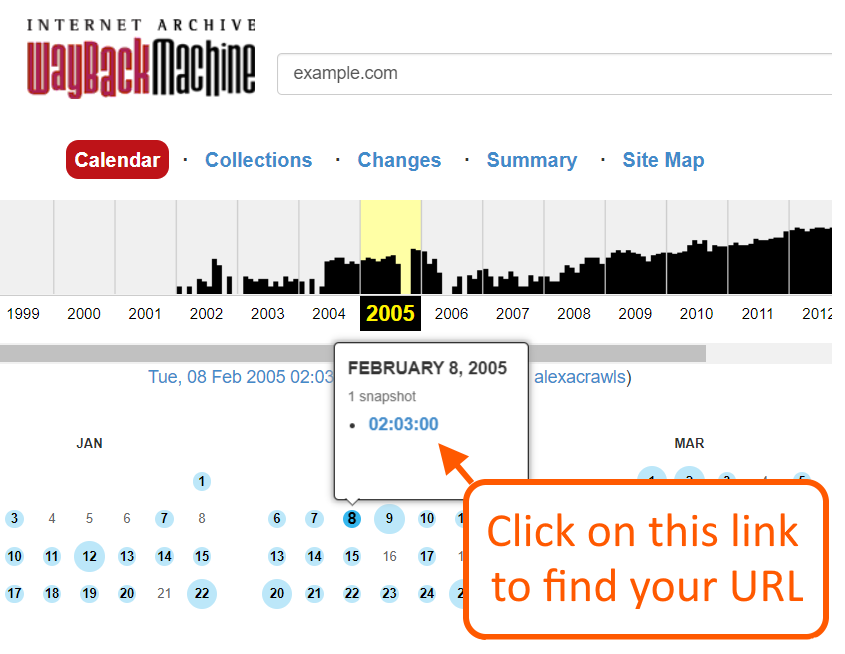
First find your website’s address on https://archive.org/web/. For example:
https://web.archive.org/web/20150309210900/http://example.com/
Our software only works with a specific date. On archive.org you can find a specific date by going to the calendar and clicking on a blue circle:
Once you picked a URL, you can use it either with the free demo or the paid service:
The files are sent to your email address, after which you can continue with the installation process below.
Hosting Requirements
Make sure that you use an Apache server. Almost all cheap hosting services (Hostgator, Godaddy etc) use Apache. Also note that “Managed WordPress” hosting services do not work.
For most users, we recommend shared hosting from Namecheap ($45/year).
EASY package
For novice customers with 1 or 2 websites, we recommend our own all-inclusive hosting at $12/mo. We then install the site for you (at no additional costs) on one of our own Apache servers. You’ll receive your own cPanel access, and a website backups.
If you want to host a PBN network of 10+ WordPress sites, then we recommend EBN.
Installation Method 1 : The Easy Method
1. Register the domain with your hosting company. If you have registered the domain elsewhere, then create an add-on domain in the cPanel of your hosting company. Here is a tutorial from GoDaddy, that explains how to create an add-on domain.
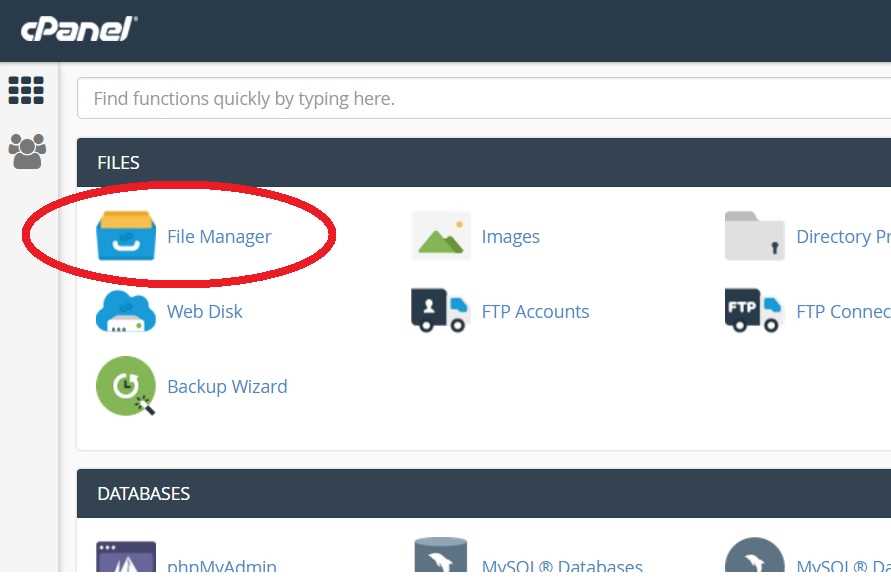
2. Login to cPanel and go to “File Manager” :
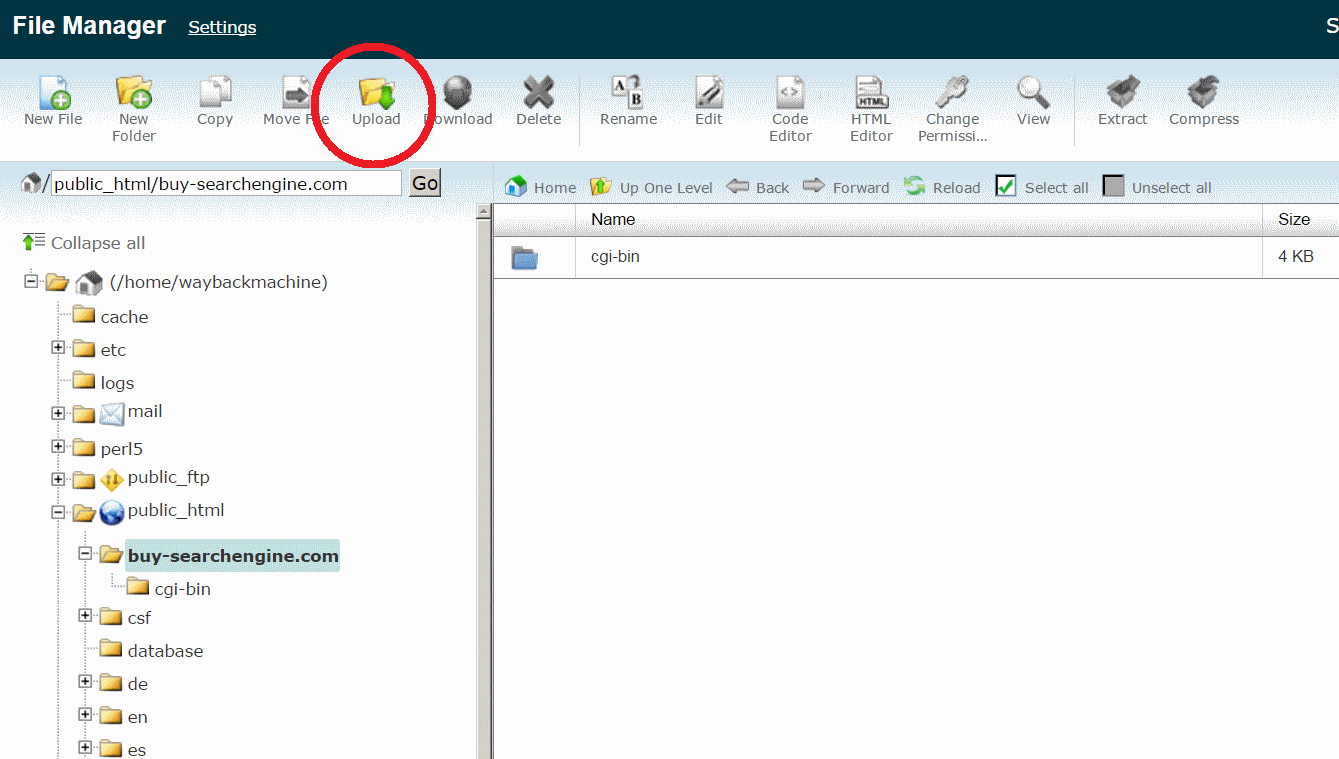
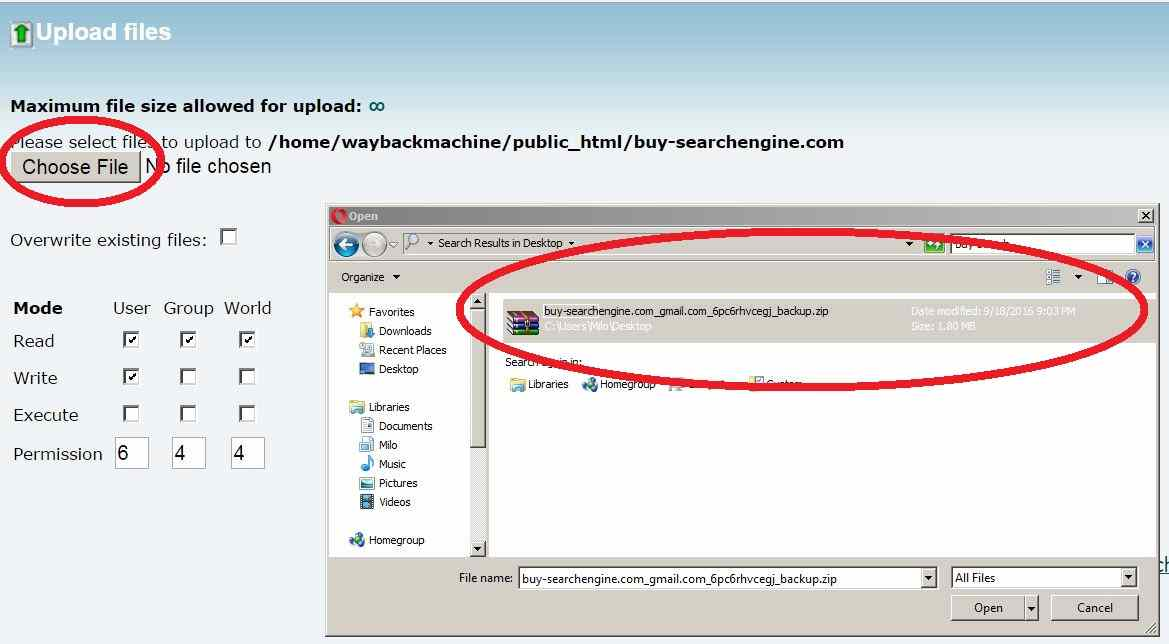
3. Browse to the root folder of your domain. Normally this is “/public_html/example.com”, as shown below. For this tutorial, we used the domain buy-searchengine.com. Then click on “Upload”:
4. Then upload the ZIP file, as shown in the picture below. This assumes that you have already downloaded the ZIP file from waybackmachinedownloader.com.
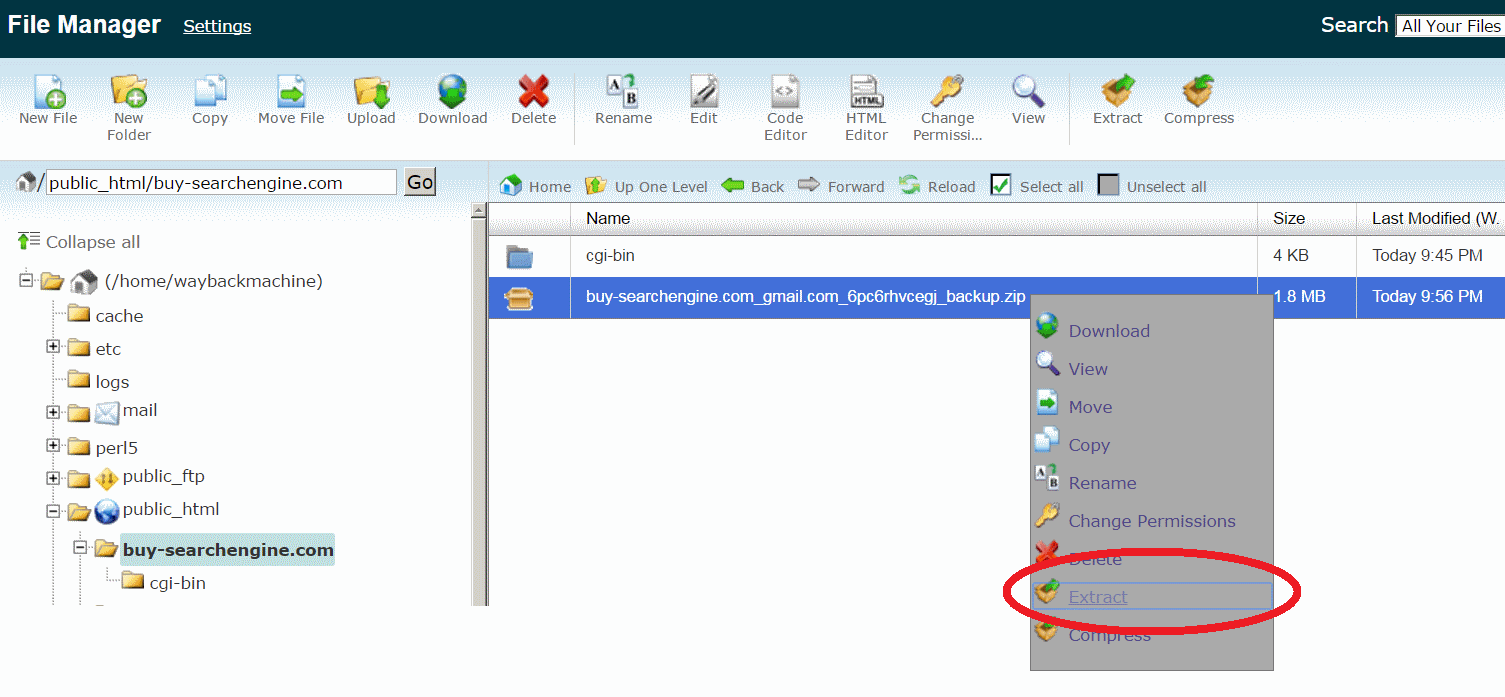
5. Extract the ZIP file:
NOTE ON .HTACCESS
In the Zip file, there’s a file called .htaccess. It’s a “hidden” file. With some control panels, the .htaccess file isn’t extracted. If the .htaccess file is not present on the server, then your front page might look weird, and links to other pages won’t work.
If you have problems with this, then upload the .htaccess file separately: extract the file on your own computer, and upload it to the server. Place it in same folder as index.html.
6. That’s it! If you purchased the domain and the hosting from different companies, then you still have to change the name servers at your domain registrar, and change them with the name servers from your hosting company.
7. If you want to edit the front page, then go to the File Manager and edit the index.html file, using a text editor. You might find it easier to copy part of that file and edit it with an online HTML editor.
WordPress Installation Instructions
If you also ordered the WordPress conversion, then wait until one of our developers sends you a ZIP file with WordPress files. This might take up to 48 hours after the scraping has finished.
8. Upload and extract this ZIP file as described above in step 2-6, in the same way as yep 2-6, in the same way as you would do with a zip file with HTML files. In the ZIP file there is also a folder called “database”. If you want to save some time, you can remove this folder from the ZIP file, because you do not need to upload it. You will need the folder later though.
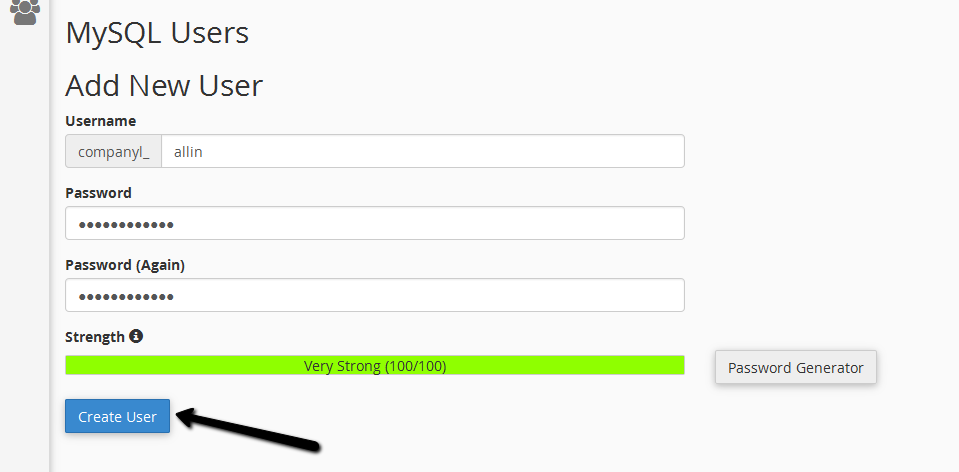
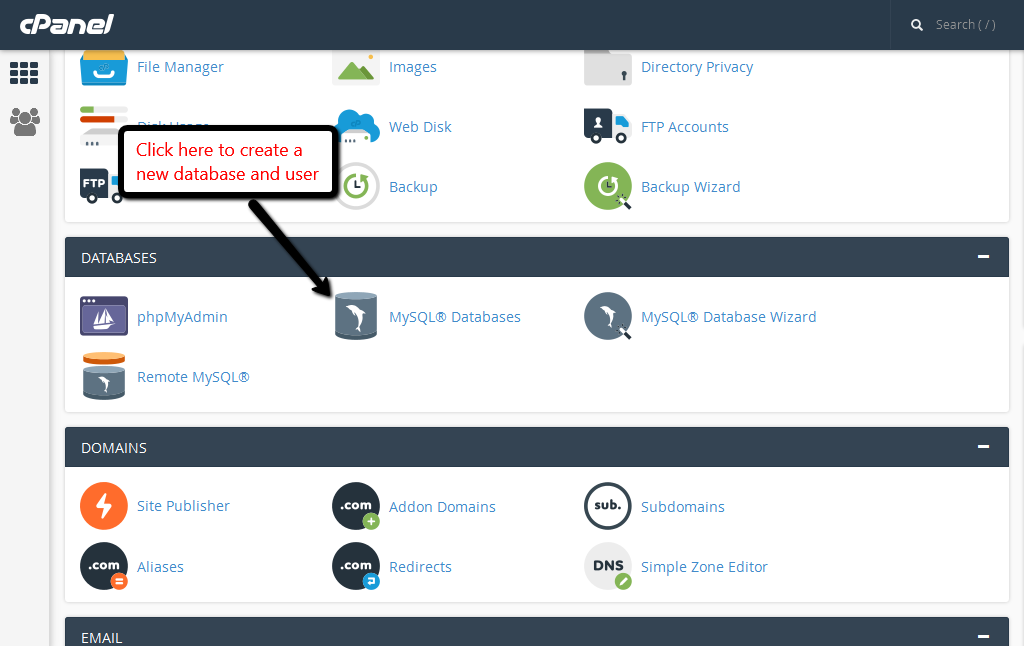
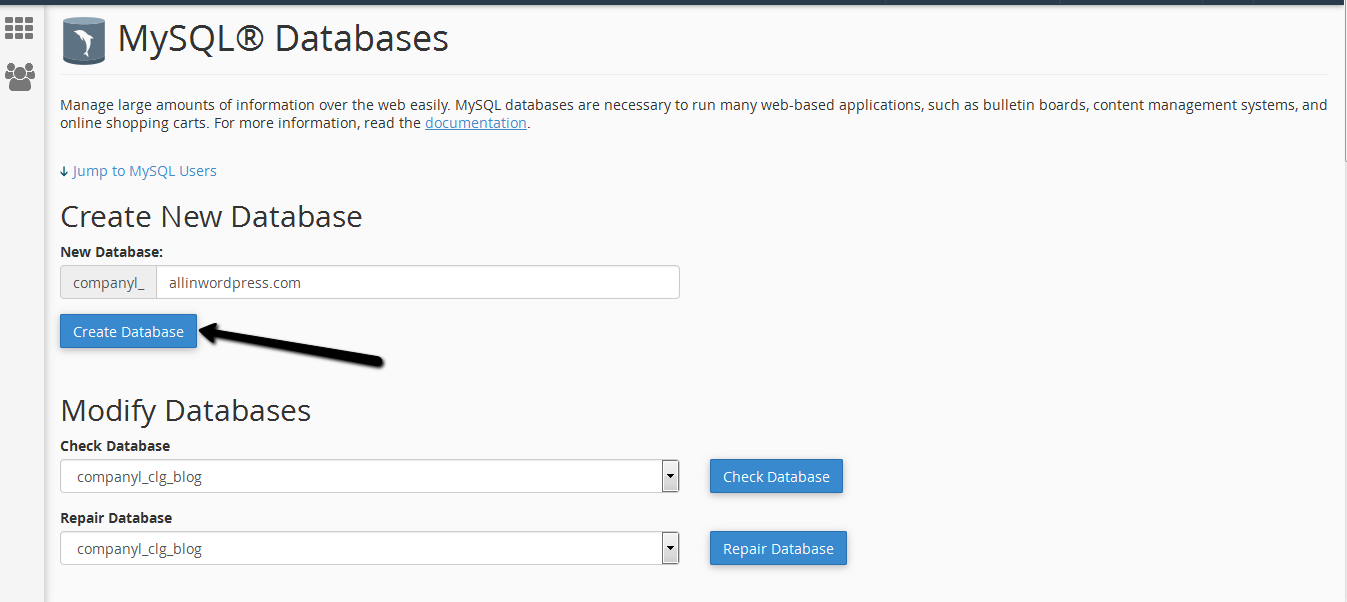
9. Go to your “cPanel” and open “MySQL Databases”. Create a new database. You can name it anything, but in the screenshot below we use the name allinwordpress.com. You will need this name later, so pick something easy.
10. Create a new user and password. The name can be anything, but you’ll need it later.